Costumes & Budget Management
Sensitive data. Costume and measurement data may include sensitive personal data; collect only what the production needs.
Professional costume tracking from measurements to quick changes, with integrated budget oversight.
Overview
The Costumes module provides comprehensive costume management for theatrical productions. Track every piece, manage measurements, log fittings, and coordinate quick changes—all in one place.
Getting Started
Accessing Costumes
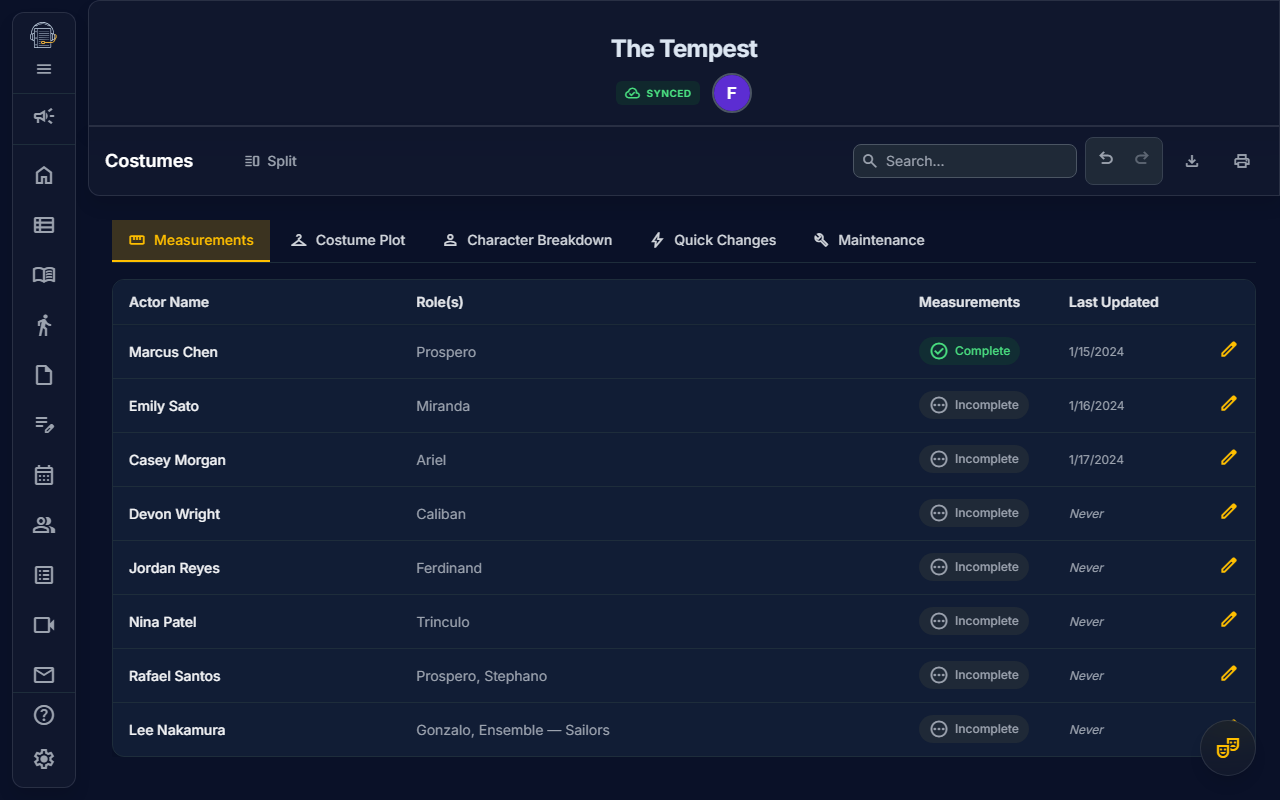
- Navigate to the Costumes tab in the main navigation
- You'll see subtabs for different aspects of costume management:
- Measurements — Actor sizing profiles
- Pieces — Costume inventory
- Fittings — Fitting session logs
- Quick Changes — Fast change coordination
- Maintenance — Repair and laundry tracking
Measurements
31-Point Anatomical Tracking
Create comprehensive measurement profiles for each actor:
Upper Body
- Bust/Chest, Waist, Hips
- Neck, Shoulder, Bicep
- Arm Length, Wrist
Lower Body
- Inseam, Outseam
- Thigh, Height
Sizing
- Shirt/T-Shirt Size, Pants Size
- Shoe Size, Hat Size
- Glove Size, Dress Size, Jacket Size
Additional Information
- Allergies (fabric, latex, etc.)
- General notes
Creating a Measurement Profile
- Click Add Measurement Profile
- Select the actor from the dropdown
- Enter measurements in your preferred units
- Document any allergies or special considerations
- Save the profile
Tip: Measurement profiles automatically link to the actor's characters, making costume assignments easier.
Self-Service Sizing (Cast Members)
Cast members can fill in their own measurements directly from Settings -> Profile:
- Open Settings from the sidebar
- Choose the Profile subtab and open the measurements section
- Progress ring shows completion (e.g., "12/31 measurements")
- Fill in sizing information and body measurements
- Save automatically syncs to the Costume Department
How It Works:
- Onboarding Prompt — Actors with sparse profiles see an "Action Needed" banner
- Progress Tracking — Visual ring shows percentage complete
- Approval Workflow — Only the Costume Department can mark profiles as "Complete"
- Smart Defaults — Silhouette mode auto-selects based on actor's pronouns
Note: The Measurements tab only appears for cast members, not crew or production staff.
Costume Pieces
Adding Pieces
Each costume piece tracks:
| Field | Description |
|---|---|
| Description | What the item is (e.g., "Blue Victorian Coat") |
| Scene | Which scene the piece appears in |
| Character | Which character wears it |
| Status | Workflow stage (TBD, To Build, To Buy, Ready to Fit, Complete) |
| Source | Where it came from (Stock, Purchased, Rental, Borrowed, Built) |
| Images | Reference photos |
| Notes | Additional details |
Source Tracking
Understanding where each piece comes from helps with returns and budget:
- Stock — Already owned by the theater
- Purchased — Bought new for this production
- Rental — Rented with return date
- Borrowed — On loan from another source
- Built — Custom-made for this production
Status Workflow
Track pieces through the production process:
TBD → To Build/To Buy → Ready to Fit → CompleteQuick Changes
What is a Quick Change?
A quick change is any costume change that happens rapidly during the show, typically with dresser assistance.
Tracking Quick Changes
For each quick change, you can specify:
- Duration — Expected time in seconds
- Location — Where the change happens (Stage Left, Quick Change Booth, etc.)
- Assigned Dresser — Who assists with the change
- Notes — Special instructions
Urgency Indicators
Changes under 30 seconds are highlighted in red throughout the interface to flag high-urgency moments.
Fittings
Logging Fittings
Keep a record of all fitting sessions:
- Click Add Fitting
- Select the actor
- Set the date
- Choose which pieces were fitted
- Add notes about alterations needed
- Record who conducted the fitting
Fitting History
View the complete fitting history for any actor to track alterations over time.
Budget Tracking
Per-Piece Budgeting
Each costume piece can track:
- Estimated Cost — Budgeted amount
- Actual Cost — What was actually spent
- Receipt URLs — Links to uploaded receipt images
Budget Dashboard
Access the production-wide Budget Dashboard from the header:
- Click the green Budget button (requires VIEW_BUDGET permission)
- View summary cards:
- Estimated Total — Sum of all estimated costs
- Actual Spent — Sum of all actual costs
- Variance — Difference (green = under budget, red = over)
- Rental Count — Number of rental items
Grouping Options
Analyze your budget by:
- Status — See spending by workflow stage
- Character — Budget per character
- Source — Spending by acquisition method
Rental Returns
The dashboard includes a dedicated section for rental items with return dates, highlighting overdue items.
Maintenance
Tracking Maintenance Needs
Mark pieces that need attention:
- Needs Repair — Torn, broken, or damaged items
- Needs Laundry — Items requiring cleaning
Clearing Maintenance Flags
When maintenance is complete:
- Navigate to the Maintenance subtab
- Find the item
- Click Mark Repaired or Mark Clean
Adding to Organization Inventory
Costume pieces sourced from Stock, Purchased, or Built can be promoted to your organization's permanent inventory:
- Open a costume piece's detail modal
- Click "Add to Org Inventory"
- The piece is registered in your organization's inventory with condition, location, and usage history
- A ✅ "In Inventory" badge appears on the piece
Automatic prompts: During the Archive Sweep, you're prompted to review all eligible costume pieces before archiving a production.
Printing
Costume Bible
Generate a comprehensive production document:
- Click Print in the header
- Select Costume Bible
- Choose which sections to include:
- ☑️ Measurements
- ☑️ Costume Plot
- ☑️ Character Breakdown
- ☑️ Budget Summary
- ☐ Receipts Appendix (optional)
- Click Print
The Costume Bible includes:
- Professional cover page with show branding
- Table of contents
- All selected sections with proper formatting
Quick Change Plot
Generate a focused document for dressers:
- Click Print in the header
- Select Quick Change Plot
- Options:
- ☑️ Show Cover Page
- ☑️ Show Dresser Summary
- Click Print
Includes:
- Statistics summary
- Scene-by-scene quick change table
- Per-dresser assignment cards
Permissions
Who Can Access What
| Feature | Required Permission |
|---|---|
| View Costumes | MANAGE_COSTUMES |
| Edit Costumes | MANAGE_COSTUMES |
| View Budget Dashboard | VIEW_BUDGET |
Default Role Access
| Role | Costumes | Budget |
|---|---|---|
| Owner | ✅ | ✅ |
| Stage Manager | ✅ | ✅ |
| Designer | ✅ | ✅ |
| Actor | ❌ | ❌ |
| Crew | ❌ | ❌ |
Tips & Best Practices
Measurement Day
- Schedule a dedicated measurement session early in pre-production
- Have actors wear form-fitting clothing
- Take photos of how you measured for consistency
Quick Change Rehearsals
- Run quick changes multiple times before tech
- Time each change and update the duration field
- Assign backup dressers for critical changes
Budget Management
- Enter estimated costs during shopping/planning
- Update actual costs as soon as purchases are made
- Upload receipts immediately for accurate records
Troubleshooting
Measurements Not Showing for Actor
- Ensure the actor is added to the Cast in Personnel
- Create a new measurement profile linked to that actor
Quick Change Not Flagged
- Verify the "Is Quick Change" toggle is enabled on the costume piece
- Check that duration is entered (even if estimated)
Budget Dashboard Not Visible
- Confirm your role has VIEW_BUDGET permission
- Contact your project Owner to grant access
Need more help? Check the Troubleshooting Guide or reach out to support.