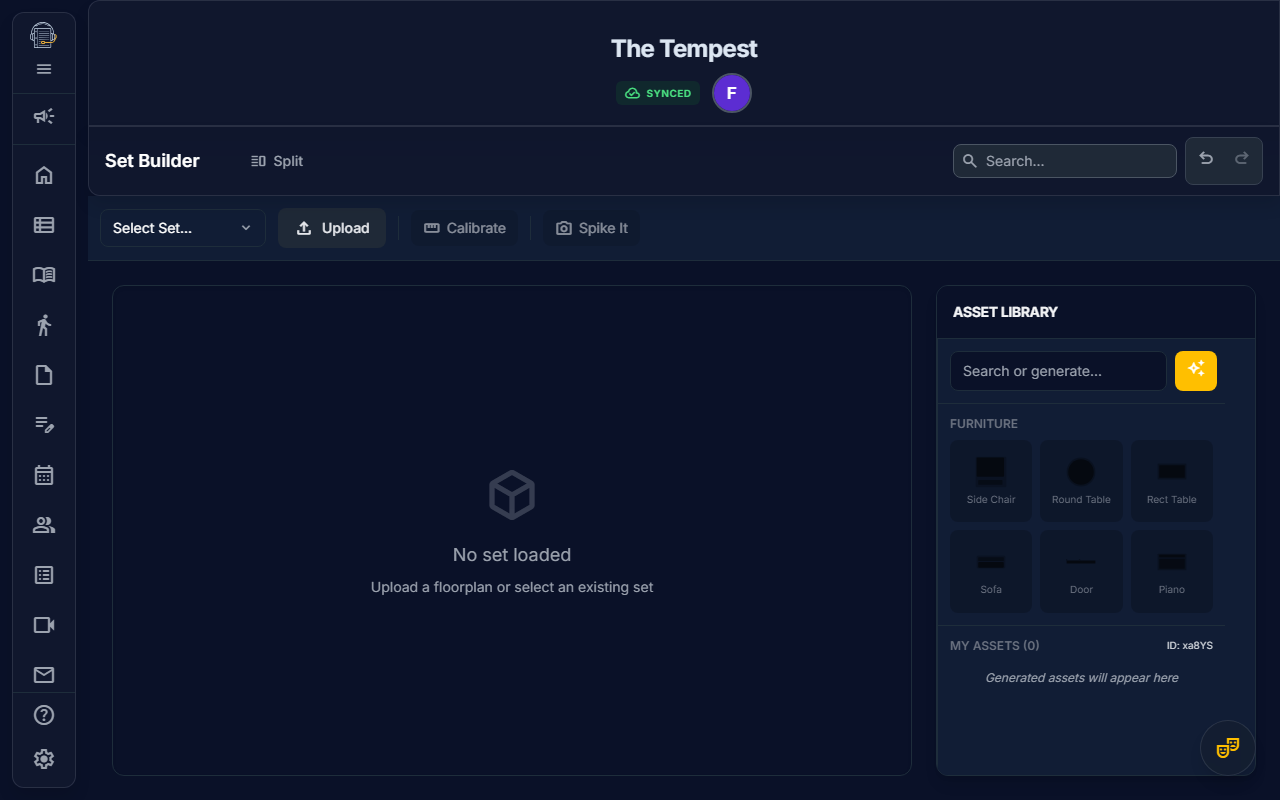
Set Builder
Planning aid. Set Builder is best used for planning, not final safety or construction documentation.
Design your stage layouts with real-world scale and AI-generated assets.
Overview
The Set Builder is a 2D canvas tool for designing stage layouts. It allows you to:
- Create stage layouts — Top-down view of your performance space
- Calibrate to real scale — Match your floorplan to actual dimensions
- Drag-and-drop assets — Furniture, platforms, and architectural elements
- Generate AI assets — Describe what you need and AI creates it
- Bake sets — Save configurations for reuse across scenes
Getting Started
Opening the Set Builder
- Navigate to Set Builder in the sidebar
- The canvas loads with your stage area
Understanding the Interface
| Area | Purpose |
|---|---|
| Canvas | Main stage view where you arrange elements |
| Asset Tray | Library of draggable furniture and set pieces |
| Toolbar | Tools for selection, drawing, calibration |
| Properties Panel | Edit selected element details |
Calibrating Your Stage
Calibration ensures your virtual stage matches real-world dimensions.
Step-by-Step Calibration
- Click "Calibrate" in the toolbar
- Import a floorplan (optional):
- Click "Upload Floorplan"
- Select your groundplan image (PNG, JPG, or PDF)
- The image appears as a background layer
- Draw a reference line:
- Click and drag across a known distance (e.g., proscenium width)
- A measurement line appears
- Enter the real measurement:
- In the popup, enter the actual distance (e.g., "40 feet")
- Click "Apply"
- All elements now scale correctly
Why Calibrate?
- AI-generated assets appear at correct size
- Distances on screen reflect actual spacing
- Blocking paths show realistic movement distances
- Print outputs have accurate scale indicators
Using the Asset Tray
Built-in Assets
The Asset Tray includes common set pieces:
- Furniture: Sofas, chairs, tables, beds
- Platforms: Riser, steps, stage blocks
- Architecture: Doors, windows, walls
- Props: Tables, desks, benches
Adding Assets to Stage
- Click and drag an asset from the tray
- Drop it onto the canvas
- The asset appears at the drop location
- Resize using corner handles
- Rotate using the rotation handle
Moving and Adjusting
- Click to select an element
- Drag to move it
- Corner handles to resize
- Rotation handle (top) to rotate
- Delete key to remove
AI Asset Generation
Can't find what you need? Let AI create it.
Generating an Asset
- Click "Generate Asset" in the toolbar
- Describe what you need:
- "Blue Victorian sofa"
- "Art deco floor lamp"
- "Round dining table for six"
- Click "Generate"
- Wait 5-15 seconds for AI to create the SVG
- The asset appears in your personal asset library
- Drag it onto the stage
How AI Assets Work
- Generated as SVG icons (scalable vector graphics)
- Include real-world dimensions in metadata
- Automatically scale to match your calibration
- Saved to your project for reuse
Tips for Good Prompts
- Be specific: "Red velvet chaise lounge" > "couch"
- Include style: "Mid-century modern" or "Gothic"
- Mention size if unusual: "Child-sized desk"
Baking Sets
Baked sets are saved stage configurations that can be reused across scenes.
Saving a Set
- Arrange your stage elements
- Click "Bake Set" in the toolbar
- Enter a name (e.g., "Living Room - Act 2")
- Click Save
Loading a Saved Set
- Click "Load Set"
- Select from your saved configurations
- The stage updates with that layout
Linking Sets to Scenes
- Go to Show Structure
- Select a scene
- In scene properties, choose the associated set
- Now when you open that scene in Blocking, the set loads automatically
Floorplan Overlay
Import your theatre's actual groundplan as a reference.
Importing a Floorplan
- Click "Upload Floorplan" in the toolbar
- Select your image file
- The image appears behind your set elements
- Adjust opacity if needed
Working with the Overlay
- Trace over architectural features
- Calibrate using known distances on the plan
- Toggle visibility to show/hide the overlay
Keyboard Shortcuts
| Shortcut | Action |
|---|---|
Delete / Backspace | Delete selected element |
Ctrl + Z | Undo |
Ctrl + Shift + Z | Redo |
Ctrl + D | Duplicate selected |
Arrow Keys | Nudge selected element |
Shift + Arrow | Larger nudge |
Tips for Success
emoji_objects Calibrate early — Set up real-world scale before adding elements
emoji_objects Use baked sets — Save and reuse common configurations
emoji_objects Name sets clearly — "Act 2 Ballroom" beats "Set 3"
emoji_objects Link to scenes — Automatic loading saves time in blocking
emoji_objects Generate custom assets — AI fills gaps in the built-in library
Integration with Other Tools
| Tool | Integration |
|---|---|
| Blocking | Sets load automatically for linked scenes |
| Show Structure | Scenes can be assigned specific sets |
| Files | Floorplans can be stored in repository |
Video Tutorial
Video walkthrough: planned.
Related Guides
Last updated: January 2026