Cloud Files
Review retention limits. Check data retention behavior before uploading scripts or sensitive files.
Manage your production's documents, media, and assets in one place.
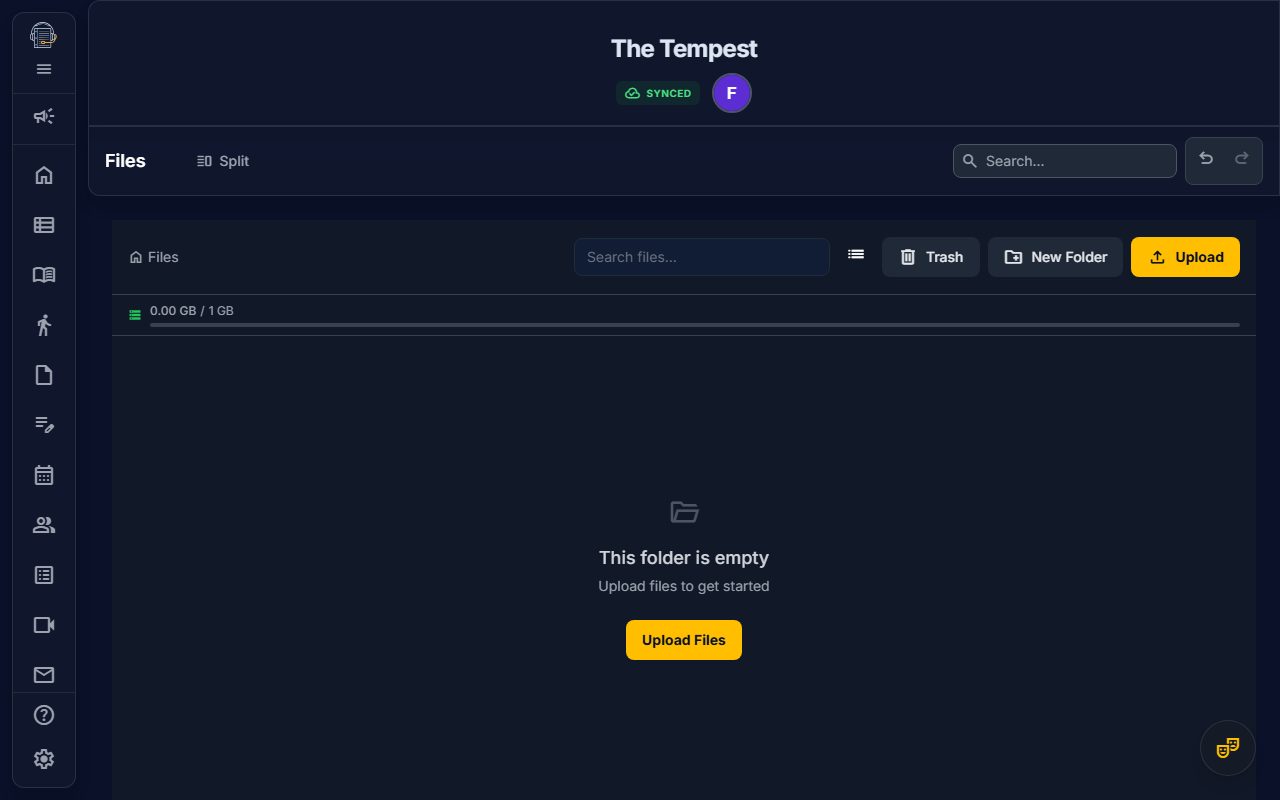
Overview
The Cloud Files tool is your production's file management system:
- Centralized storage — All project files in one location
- Folder organization — Nested directories for structure
- File versioning — Track changes with automatic version history
- Offline access — Mark files for offline availability
- Trash & recovery — 30-day trash retention before permanent deletion
- Shared access — Owners and file-access managers can choose project-wide, role, user, or owner-only access
Getting Started
Opening Files
- Navigate to Files in the sidebar
- You'll see the file browser with your project's files
The Files Interface
| Area | Purpose |
|---|---|
| Breadcrumbs | Shows current folder path |
| Toolbar | Upload, new folder, view options |
| File Browser | Grid or list of files and folders |
| Preview Panel | Preview selected file |
Phone Layout
On phone-sized screens, Files keeps actions visible instead of hiding them behind hover behavior:
- Tap a file or folder once to open it.
- Restore, download, offline, and trash actions use larger touch targets.
- Trash shows restore actions directly on each item.
Desktop and tablet layouts still use the grid/list selection pattern and double-click/open actions where appropriate.
Navigating Files
Folder Navigation
- Click a folder to open it
- Breadcrumbs at the top show your current path
- Click any breadcrumb to jump back to that level
- Home icon returns to the root folder
View Modes
Toggle between views using the toolbar:
| View | Best For |
|---|---|
| Grid | Visual browsing with thumbnails |
| List | Detailed view with file info |
Sorting
Sort files by:
- Name (A-Z or Z-A)
- Date (newest or oldest first)
- Size (largest or smallest first)
- Type (grouped by file type)
Searching
- Type in the search box
- Results filter in real-time
- Search matches file names only
Uploading Files
Single File Upload
- Click Upload in the toolbar
- Select a file from your computer
- Wait for the upload to complete
- The file appears in the current folder
Drag and Drop
- Drag files from your computer
- Drop them onto the file browser
- Files upload to the current folder
Upload Limits
- Maximum file size: 200MB per file
- Project quota: 1GB total storage
- Larger files may take longer to upload
Progress Indicator
During upload:
- Progress bar shows completion percentage
- You can continue browsing while uploading
- Notification appears when complete
Creating Folders
Organize files with folders:
- Click New Folder in the toolbar
- Enter a folder name
- Click Create
- The new folder appears in the current directory
Folder Best Practices
Suggested organization:
📁 Scripts & Libretti
📁 Rehearsal Media
   📁 Choreography Videos
   📁 Music Tracks
📁 Design Documents
   📁 Sets
   📁 Costumes
   📁 Props
📁 Production Photos
📁 Admin Documents
File Actions
Previewing Files
Click a file to preview:
- Images: Display inline
- Videos: Play in viewer
- Audio: Playback controls
- PDFs: Document viewer
- Other: Show file info
Downloading
- Select a file
- Click Download (or use the context menu)
- File saves to your computer
Renaming
- Right-click a file or folder
- Select Rename
- Enter the new name
- Press Enter to confirm
Moving Files
- Select a file or folder
- Right-click → Move to...
- Choose the destination folder
- Click Move
Deleting
- Select a file or folder
- Click Delete or press Delete key
- Confirm the deletion
- Item moves to Trash (30-day retention)
File Versioning
On Book Pro automatically tracks file versions:
How Versioning Works
- Uploading a file with the same name creates a new version
- Previous versions are preserved
- Version numbers increment (v1, v2, v3...)
Viewing Version History
- Select a file
- Click Version History (or right-click → Versions)
- See all previous versions
- Preview or download any version
Restoring a Version
- Open version history
- Find the version you want
- Click Restore
- That version becomes the current version
Trash & Recovery
Deleted files aren't immediately removed:
Viewing Trash
- Click Trash in the sidebar (or toolbar)
- See all deleted files and folders
- Items show deletion date
Restoring from Trash
- Open Trash
- Select the item to restore
- Click Restore
- Item returns to its original location
Permanent Deletion
- Files are restorable until they are permanently deleted or cleaned up after 30 days
- Permanent deletion removes the file metadata and the stored file data when available
- Emptying Trash permanently deletes all files currently in Trash
For the broader retention policy, see Data Retention & Deletion.
Offline Access
Mark important files for offline availability:
Marking Files for Offline
- Select a file
- Click Available Offline toggle (or right-click → Make Available Offline)
- The file downloads and caches locally
Using Offline Files
When you're offline:
- Marked files are fully accessible
- You can view, preview, and use them
- Changes sync when you reconnect
Managing Offline Storage
Monitor your offline cache:
- Browser settings show cache size
- Clear offline files to free space
- Re-mark files to re-download
Sharing & Permissions
File Access
Files use access policies rather than a single public/private switch. Each file has an owner, a current access summary, and optional grants for the wider project, specific roles, or specific users.
| Summary | What It Means |
|---|---|
| Anyone in project | Any signed-in member of the project can open the file |
| Restricted | One or more roles or users have been granted access |
| Owner only | Only the file owner can open the file unless an admin-level actor has file-access authority |
Access grants can allow Access for viewing, previewing, and downloading, or Edit for file changes. File owners, project owners, organization admins, super admins, and users with MANAGE_FILE_ACCESS can manage file policies.
Changing Access
- Select a file
- Click Change access (or use the file actions menu)
- Add Anyone in this project, a role, or a user
- Choose whether each grant has Access, Edit, or both
- Click Save access
Storage Quota
Your project has a storage quota:
Checking Usage
- The storage indicator shows used vs. total
- Color coding:
- 🟢 Green: Plenty of space
- 🟡 Yellow: Over 70% used
- 🔴 Red: Over 90% used
Managing Space
Free up space by:
- Permanently deleting from Trash
- Removing unused files
- Moving large files to external storage
Integration with Other Tools
Files integrates throughout On Book Pro:
| Tool | Integration |
|---|---|
| Feed | Attach files to posts |
| Sound | Import audio files |
| Set Builder | Import floorplans |
| Costumes | Attach reference images |
| Props | Attach reference images |
| Notes | Reference attachments |
Universal File Picker
When attaching files in other tools:
- Click the attachment button
- Choose From Repository
- Select from your project files
- Files link without re-uploading
Repository-linked images in Props and Costumes remain tied to Cloud Files. On Book Pro requests a fresh preview URL when displaying those images, so restricted files still follow the file's current access policy.
Tips for Success
emoji_objects Organize early — Set up folders before uploading
emoji_objects Name clearly — Descriptive names save time
emoji_objects Use versioning — Upload newer versions rather than renaming
emoji_objects Mark offline — Cache critical files before going to venue
emoji_objects Watch your quota — Clear old files when storage is low
Video Tutorial
Video walkthrough: planned.
Related Guides
- Features Overview
- Sound — Audio file management
- Data Retention & Deletion
Last updated: May 1, 2026